Installing corrugated metal roofing panels involves careful attention to detail for a long-lasting roof. Knowing how to overlap corrugated metal roofing panels correctly is essential to prevent leaks and improve durability. Proper planning and using the right techniques allow even complex roofing projects to be managed efficiently. Here is a professional approach to mastering the overlap process for corrugated metal roofing panels.
Preparation Before Installation
The first step in installing corrugated metal panels is measuring the roof. Accurate measurements ensure you have enough materials while accounting for waste from overlaps and cuts. When calculating, add ten percent to your total square footage to cover any unexpected needs during installation.
Choosing the right panels is just as important. Common panel widths range from 37 to 39 inches, but you need to focus on the coverage area after overlaps. This consideration keeps your roof secure and weather-tight while maintaining an efficient use of materials.
Setting Up for Success
Start by preparing the surface where the panels will be installed. Clean the roof deck thoroughly, removing debris and uneven surfaces. Before laying down the first panel, apply butyl tape along the seam of the lower panel where the overlap will occur. Butyl tape acts as a sealant, preventing water from seeping into the gaps.
Positioning the Panels Correctly
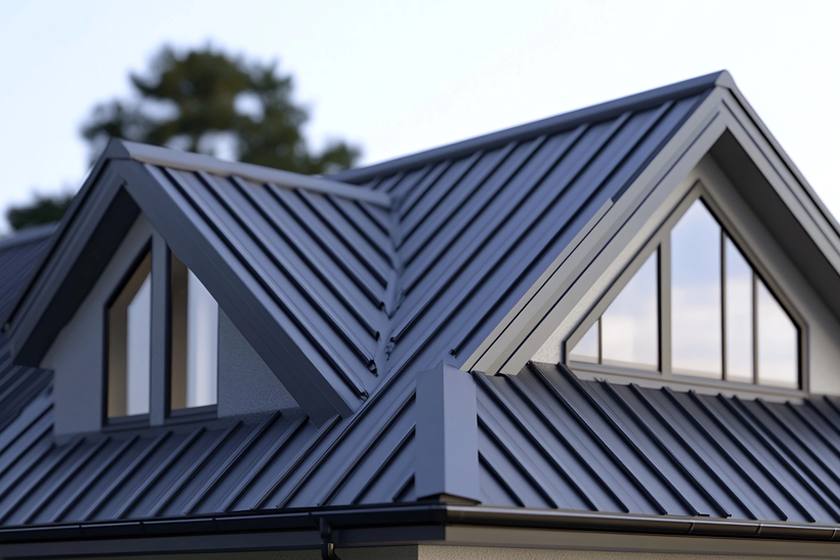
When placing the panels, each one should overlap the previous panel by at least two corrugations, typically four to six inches. This overlap is critical to directing water away from seams, and ensuring proper drainage. Begin installation at the lower edge of the roof and work upwards, aligning overlaps in the direction of prevailing winds to avoid water infiltration.
Proper alignment is vital. Misaligned panels not only compromise the appearance of the roof but can also allow water and debris to enter, leading to potential damage.
Fastening Panels Securely
Once the panels are in place, secure them with screws specifically designed for metal roofing. Place screws along the high seams of each panel, spacing them about every third corrugation. This minimizes water exposure and keeps the panels firmly in position.
Avoid overtightening the screws. Applying too much pressure can deform the metal, creating gaps that undermine the roof’s integrity. Tighten the screws enough to hold the panels securely without causing any damage.
Final Touches for a Clean Finish
After installing all the panels, inspect your work carefully. Look for gaps or misalignments and address them promptly. Seal any visible seams with caulk or an additional sealant to strengthen the roof’s defenses against moisture. Use tin snips or a circular saw to trim any excess panel material at the edges, leaving a clean and polished finish.
Keep Safety and Codes in Mind
Roofing projects can be dangerous, especially on steep or large roofs. If you are unsure about your ability to handle the installation, consult professional metal roofing contractors in Maine. Always adhere to local building codes, especially regarding overlaps and fasteners, to meet safety and structural requirements.
Building a Roof You Can Trust
At Monastery Roofing, we understand the importance of a well-installed roof. With over 15 years of experience, our team of professionals takes pride in delivering high-quality roofing solutions. From precise installations to thorough inspections, we treat every project with care and attention.
Contact us to discuss your roofing needs and learn how we can help make your home safe and beautiful.