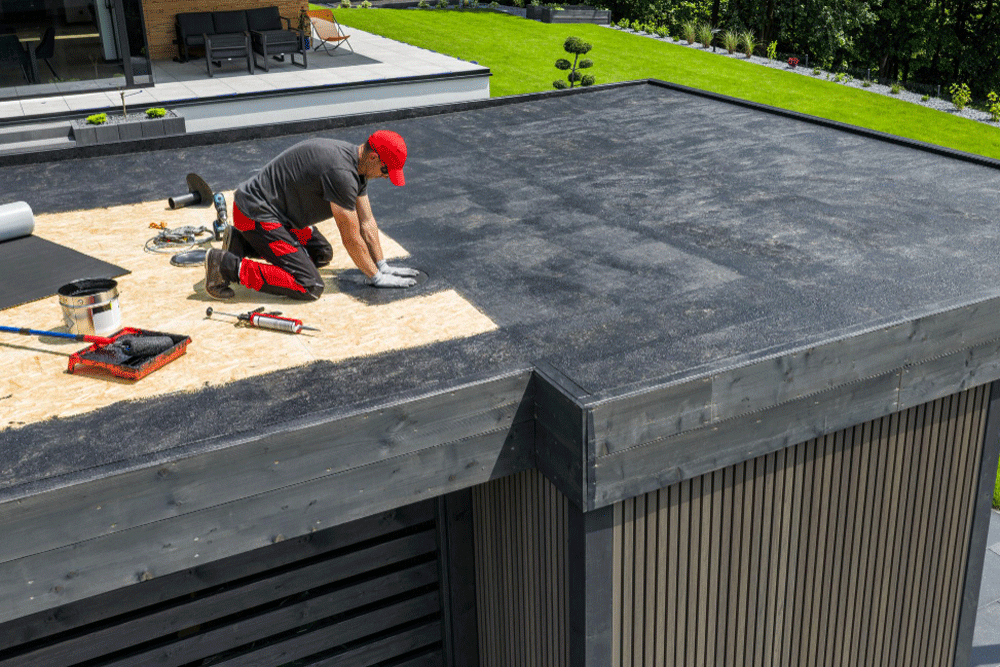
Quick Summary
Flat garage roof work begins with locating the true leak source, identifying the roofing material, and preparing a clean, dry surface. Small cracks, punctures, blisters, and loose seams need compatible patching products applied beyond the damaged edges. Clear drains and correct ponding water so moisture does not return beneath the treated area. Soft decking, repeated leaks, widespread blisters, or visible sagging require professional inspection.
A flat garage roof can develop leaks when cracks, loose seams, worn surfaces, or standing water expose weak areas. Learning how to repair a flat garage roof begins with finding the real source of moisture rather than covering the first visible stain. Careful preparation and compatible materials help create a cleaner, longer-lasting result.
How to Repair a Flat Garage Roof Safely
Begin by checking the weather and choosing a dry day with mild temperatures. Moisture, frost, strong wind, and extreme heat can make the surface unsafe and may stop patching materials from bonding correctly. Use a stable ladder, non-slip footwear, gloves, and eye protection before stepping onto the garage.
A safe inspection also helps you decide when professional help makes more sense. Property owners seeking roof repair and installation in Maine should avoid walking across soft, sagging, or badly damaged sections because the decking may no longer hold weight. Call a qualified roofing crew when the surface feels unstable or the damaged area extends across several sections.
Identify the Garage Roof Material
Flat garage roofs may use built-up tar and gravel, modified bitumen, EPDM rubber, PVC, TPO, or another membrane system. Each material reacts differently to adhesives, coatings, heat, and patching compounds. Using the wrong product may weaken the surface or create a temporary seal that soon separates.
Tar-and-gravel systems usually contain layers of asphalt or bitumen, reinforced roofing felt, and a protective gravel surface. The gravel shields the layers beneath from sunlight, weather, and light physical damage. Missing gravel can leave the asphalt exposed and more likely to dry, crack, or blister.
Read any labels, previous project documents, or manufacturer information before buying materials. When the roof type remains unclear, a professional inspection can identify the system and suitable treatment method.
Locate the Source of the Leak
Start inside the garage and mark stains, damp insulation, peeling paint, mould, or active drips. Remember that water may travel along decking, framing, or membrane layers before appearing indoors. The visible stain may sit several feet away from the opening above it.
Inspect the exterior area uphill from the indoor mark, even on a roof that appears level. Check seams, flashing, drains, vents, wall connections, roof edges, punctures, and places where gravel has shifted. Look for cracks, bubbles, loose material, exposed asphalt, and sections where water remains after rainfall.
Clean and Dry the Damaged Section
A successful flat roof garage repair depends heavily on surface preparation. Sweep away leaves, dirt, loose gravel, broken material, and other debris until the damaged area becomes fully visible. Move gravel aside carefully on built-up roofs so it can be returned after the patch cures.
Clean the surrounding surface according to the product instructions. Some systems need only a dry brush and cloth, while others require a cleaner approved by the membrane manufacturer. Do not use harsh solvents unless the roofing material specifically permits them.
Let the section dry completely before applying cement, primer, tape, or membrane patches. Sealants placed over damp dirt often lose adhesion and trap moisture beneath the new layer. Trapped moisture can lead to recurring bubbles, peeling edges, and another leak.
Patch Small Cracks and Punctures
For a small crack in a compatible bitumen surface, spread roofing cement beyond every edge of the damaged spot. Embed fibreglass reinforcing fabric into the wet cement, press it flat, and cover it with another even layer. The patch should extend past the crack so water cannot easily enter around its edges.
Membrane roofs usually require a patch made for that exact material. Cut the patch with rounded corners because sharp corners may lift more easily. Apply primer, adhesive, or seam tape as directed, then press the patch firmly with a roller.
Do not assume that one universal sealant can repair flat roof garage surfaces made from different materials. A product designed for asphalt may damage rubber or fail to bond with plastic-based membranes. Compatibility matters more than choosing the thickest coating available.
Treat Blisters and Raised Areas
Blisters form when air or moisture becomes trapped beneath the roofing surface. Small, dry blisters may remain stable, but split, soft, or growing bubbles need closer attention. Pressing sealant over the top rarely addresses the trapped material underneath.
A suitable treatment may involve carefully opening the raised section, allowing it to dry, applying compatible cement beneath it, and pressing the material back into position. Reinforcing fabric and another surface layer may then cover the treated area. This method applies mainly to certain built-up systems and should not be copied onto every membrane type.
Large or repeated blisters may indicate moisture within the insulation or decking. In that case, a surface patch may hide the symptom while deterioration continues underneath. Arrange an inspection before cutting into a widespread raised section.
Check Flashing, Seams, and Roof Edges
Flashing protects areas where the garage roof meets walls, vents, drains, skylights, and metal edges. Look for gaps, lifted corners, rust, cracked sealant, and loose fasteners. Even a small separation can channel rain beneath the roof covering.
Clean minor gaps and apply a compatible flashing sealant when the surrounding material remains sound. Loose metal may need secure fastening before sealing, while corroded sections may require new matching material. Avoid driving random screws through the roof because each hole creates another possible water entry point.
Inspect the Completed Work
Check the patch edges, seams, flashing, and drainage path after the stated curing period. Look for lifting corners, cracks, soft spots, or areas where the compound has pulled away. Examine the garage interior during and after rain for fresh stains or dampness.
Schedule routine checks in spring, autumn, and after severe weather. Early attention to small openings, debris buildup, and shifting gravel can limit moisture damage. An experienced asphalt roofing contractor in Maine can also review uncertain areas before they develop into larger problems.
Protect Your Flat Garage Roof for the Long Term
A dependable result comes from accurate leak detection, careful cleaning, dry working conditions, compatible products, and sound drainage. When damage involves broad moisture, structural movement, repeated blisters, or unsafe surfaces, professional evaluation remains the safer choice.
Schedule a Flat Garage Roof Inspection
At Monastery Roofing, we use our own experienced crews, premium materials, free inspections, and 3D project pictures to give Maine property owners clear information and dependable workmanship. Contact us to request a roof quote and discuss the right roofing service for your flat garage.
FAQs
No. The damaged section should be completely dry before you apply roofing cement, adhesive, seam tape, or a membrane patch. Moisture and dirt can weaken the bond and become trapped beneath the new material. This may cause lifted edges, bubbles, or another leak after rainfall.
The correct material depends on the existing roof system. Tar-and-gravel surfaces may use compatible bitumen cement and reinforcing fabric, while EPDM, TPO, and PVC systems need patches, primers, and adhesives made for those specific membranes. Check the product instructions or arrange an inspection when you cannot identify the roof material.
A patch may fail when it covers the visible symptom but not the source. Water can enter through damaged flashing, open seams, blocked drains, low spots, or moisture trapped beneath the surface. Inspect the surrounding area and drainage path instead of treating only the indoor stain.
Arrange professional help when the roof has several leaks, widespread bubbling, soft decking, deep ponding water, structural movement, or visible sagging. These signs may point to damage below the surface layer. Roofs that feel unstable should not be walked on because weakened decking may not hold a person’s weight.